So, here is what we are going to do today:

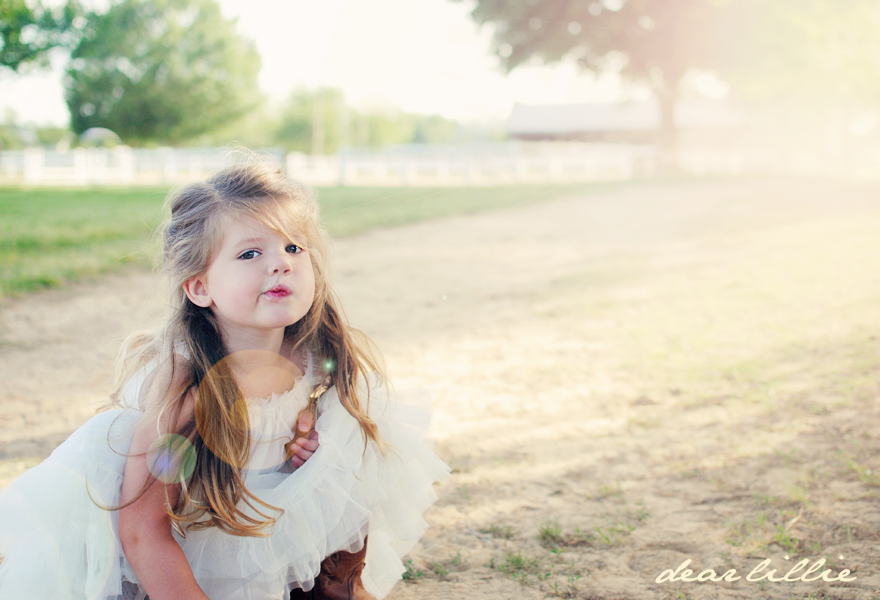
In the photo on the left I liked her little smirk but not the people and cars in the background. In the photo on the right there weren't any people behind her head but she was pouting. 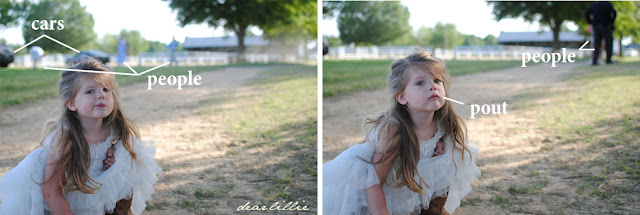

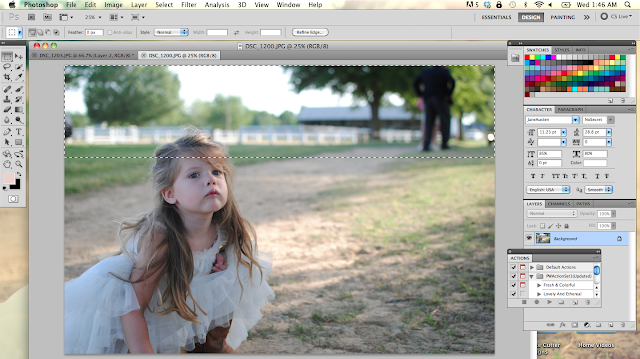
Step 1). I opened both photos in photoshop and selected the top portion of the pouty picture.
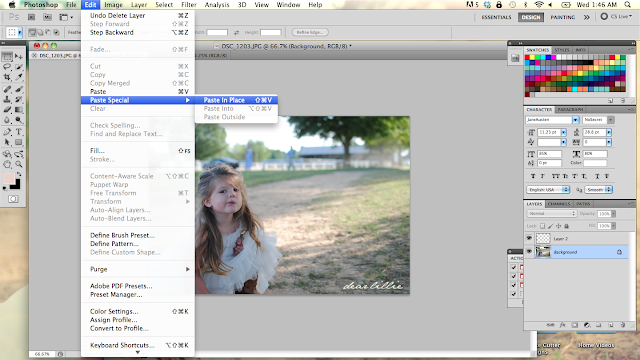
Step 2). I clicked on Copy. This is under Edit. I generally just use the shortcut though by holding down the command button and clicking on the c (and if you hold down command and hit p it will paste)

Step 3). Paste in Place. (Or just paste)
Step 4). I moved the pasted layer around a bit to get it where I wanted it.

Step 5). Next I chose the eraser tool and selected it in size 60 and 0% hardness.

Step 6). I then chose the opacity to be about 60%.

Step 7). Now I start erasing the harsh line that connects the two layers. If you look below you can see on the top left where I have done that and then still have yet to do it on the rest of the rectangle.

Step 8). I continuing using the eraser until I make my whole way around the rectangle working especially carefully near Lillie's hair area to make it look as natural as possible. I also had to erase the area near the barn roof so it didn't extend too long and look warped. Because of that the man in the original background image showed through. We will clone him out in the next step.

I forgot to take a screen shot of this when I did this last night but quickly did this today so you can see (so it might not match up perfectly - I didn't save the one I was working on last night). If you turn off the background layer this is what the top layer looked like when I was done with it.

Step 9). Now we are going to flatten the image. To do this right click on your background layer and choose "Flatten Image".

Step 10). I now choose the clone tool (circled in pink) and then find and area I want to use to clone over the man. I hold down the option key and select the area circled in pink and then clone it over the man.

Step 11). Now I make Lillie's eyes pop a tiny bit using Pioneer Woman's Bring on the Eyes action. (I plan on doing another tutorial for eye-popping and touching up skin soon - hopefully next week!)

Once I am here I make sure to click SAVE! From that finished image I can now run several different actions over it. You want to make sure you keep this image, though, before you run any of the fun actions over it.
Step 12). Now I could stop there and then just add a colorful action on top but for this image I wanted to add a lens flare. I chose the Sun and Lensflare (Right) option from Florabella's Spring Set I.

Step 13). Now I flatten the image by right clicking on the background layer.

Step 14) I then ran Paint the Moon's Warm Honey Action and then played around with the different layers to get it how I wanted it.

Step 15). And lastly I flattened it again and ran Paint the Moon's Rainbow Bright Action from her Sublime Set.

And there you have it!
I also wanted to introduce our newest sponsor:

Hometown Girl is a wonderful blog written by Susan Duane. Her western New York home was featured on Houzz.com. I am in love with her home and would be lying if I didn't admit a was jealous - this is the kind of home I dream about owning someday. It just oozes with character!

Photo by Susan Duane
Susan is now a contributing writer for Houzz.com and featured our home there earlier this year.
I hope you all will head on over and check out her blog!

Have a fabulous Thursday!

0 comments:
Post a Comment